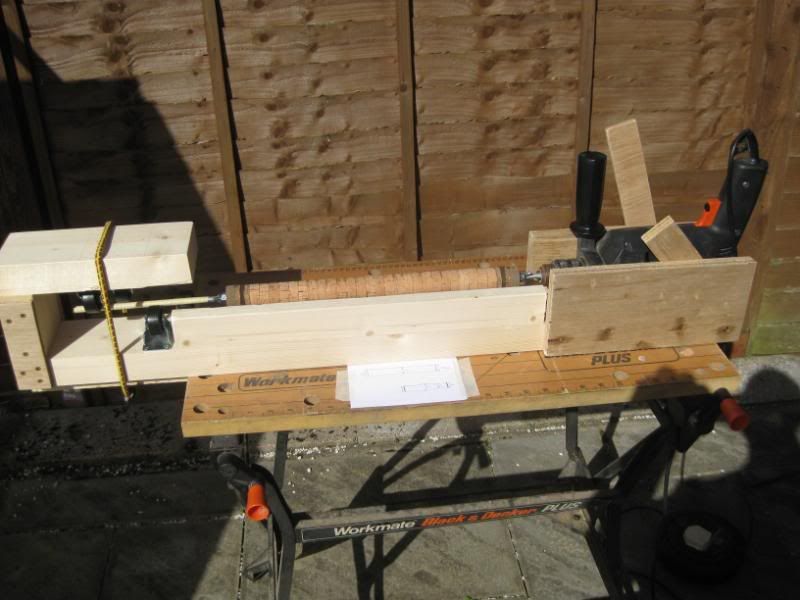
Without access to a proper lathe or mandrel, I made my own based around several different versions I saw on the internet. It was back to the DIY store for a 1m long 8mm threaded rod, a length of 44mm x 96mm timber (this is the closest I could get to what was formerly known as 2 x 4), a pack of four 40mm fixed plate nylon wheel castors. I also used a hinge, wooden base strip, and other bits and pieces that were already lying around my garage.
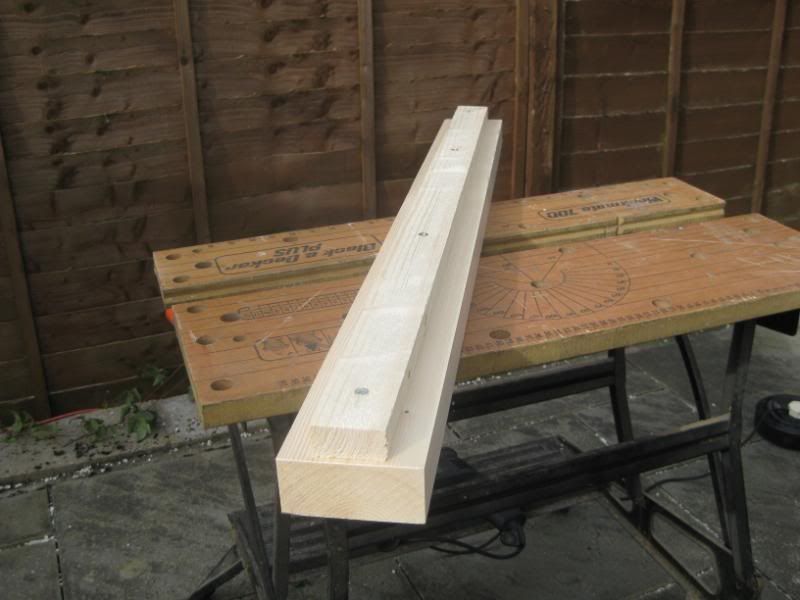
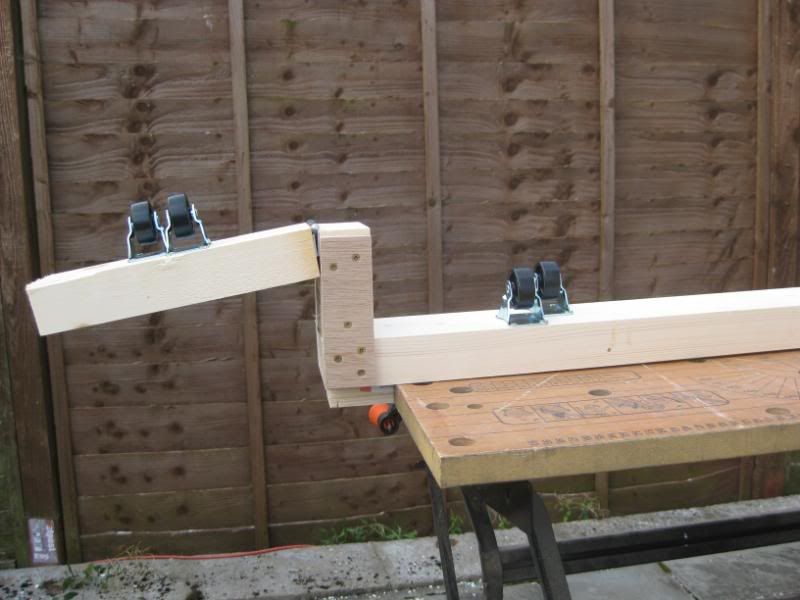
Base plate - Cut a section of 44mm x 96mm to 1m in length. Cut the base strip (which in my case was an old bit of 2 x 1 timber) to the same length and screw it on down the centre of the underside of the length of the 44mm x 96mm. The base strip will ultimately be held in the vice of my bench holding everything steady during the turning / sanding process.
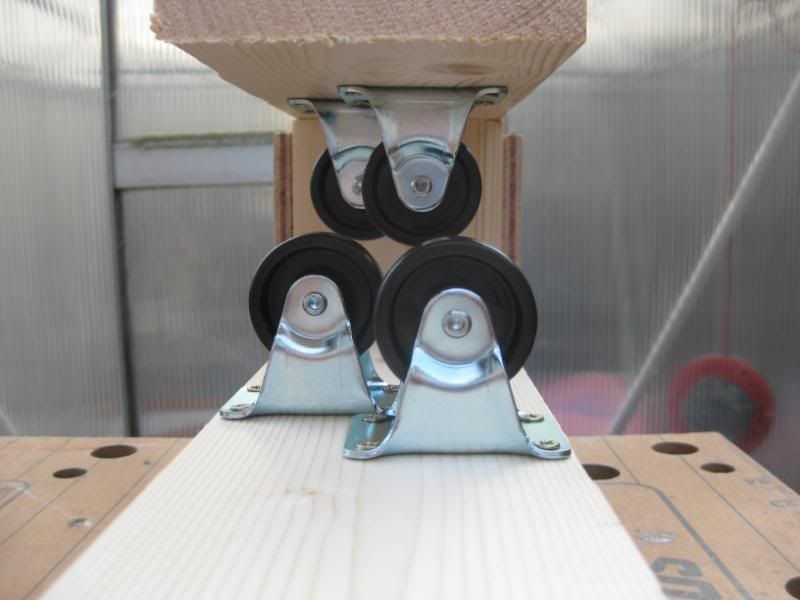
Next screw two of the wheels onto the upperside of the 44mm x 96mm so that when sighting down its length, the wheels appear slightly overlapped one behind the other and the tops of the wheels form a sort of V shape.
Top plate - Cut another piece of 44mm x 96mm, this time approx 25cm in length. Screw the two remaining wheels onto it in a similar fashion to the base plate, but so that if you invert the top plate they are positioned to the rear of the bottom pair.
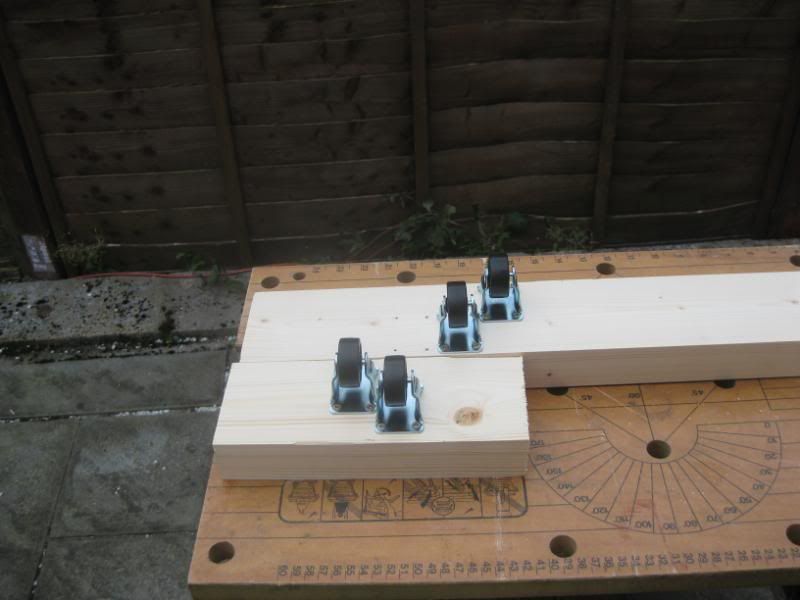
End plate - Cut a third piece of 44mm x 96mm , this time 96mm so youve got a square of timber, to hold the top plate (and its wheels) high enough above the base plate and its wheels so that when you sight down the length of the base plate theres a small diamond shaped hole between all four wheels this is the hole that will ultimately grip the end of your mandrel.
Once youve done a dry run assembly and reckon everything is in the correct position, stick it together. Screw the end plate in place to the base plate and re-enforce with wooden plates on the outside edges. Attach the top plate with a hinge so you can easily open and shut it.
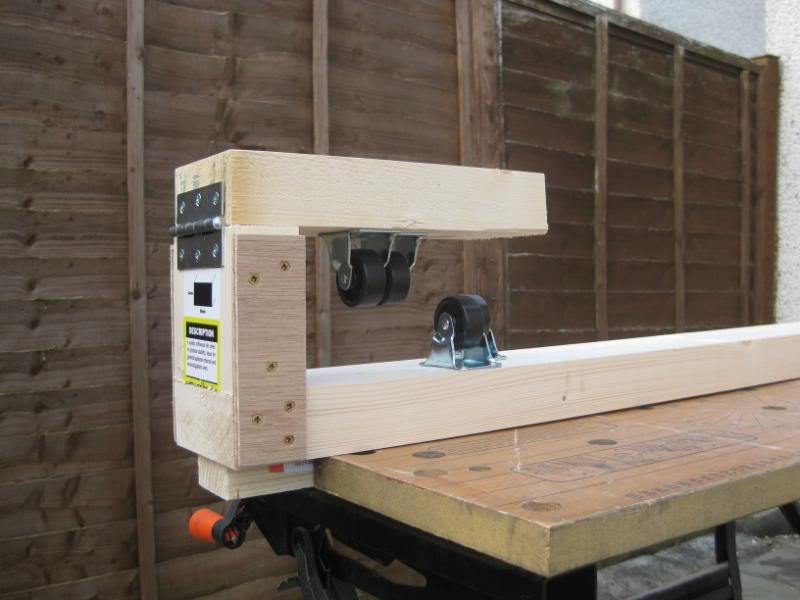
Drill housing - Next stage is the doing the other end for your lathe motor, in my case my trusty Black & Decker variable speed drill. Screw wooden side walls (roughly the same length as your drill), to each side of the base plate at the end furthest from the wheels the side walls have to be pretty strong. The side walls should be marginally lower then your drill when inverted on its back on the base plate between the side walls (so that you can tape the drill in place if necessary).
Leaning plate - Then attach a strip of wood along one side running from where the drill will be to where the wheels are youll use this plate to lean on and steady your hands whilst sanding.
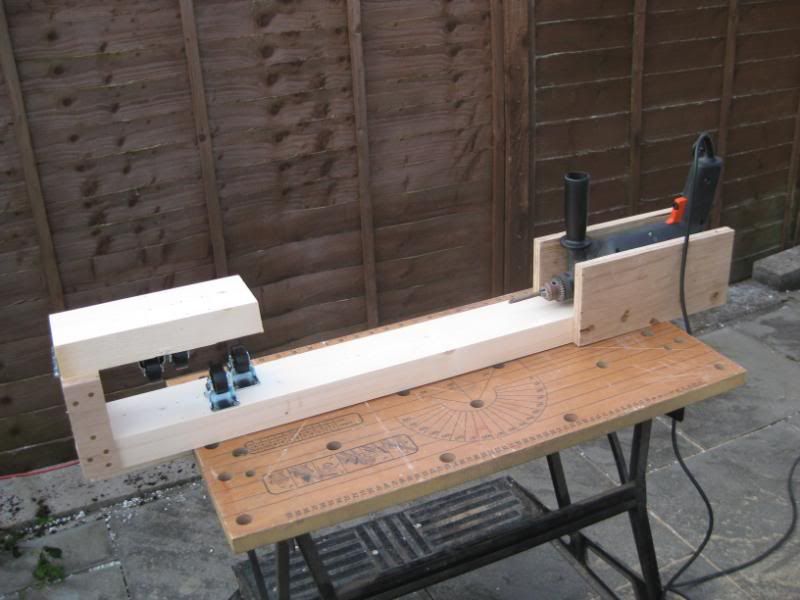
The mandrel - Stick the 1m x 8mm diameter threaded rod into your drill, and mark the rough length you reckon youll need, judging it from where the drill will sit in the drill housing at one end of the base plate, with the other end of the mandrel / threaded rod comfortably passing through the wheels at the other. For my drill and lathe I cut mine to 65cm in length.
I then used bits of thin off cut / scraps of wood to adjust the height of the drill and wedged it in place so the mandrel / threaded rod was totally horizontal and parallel to the leaning plate.
I also used a bungee cord to gently hold the wheel clamp together around the mandrel.
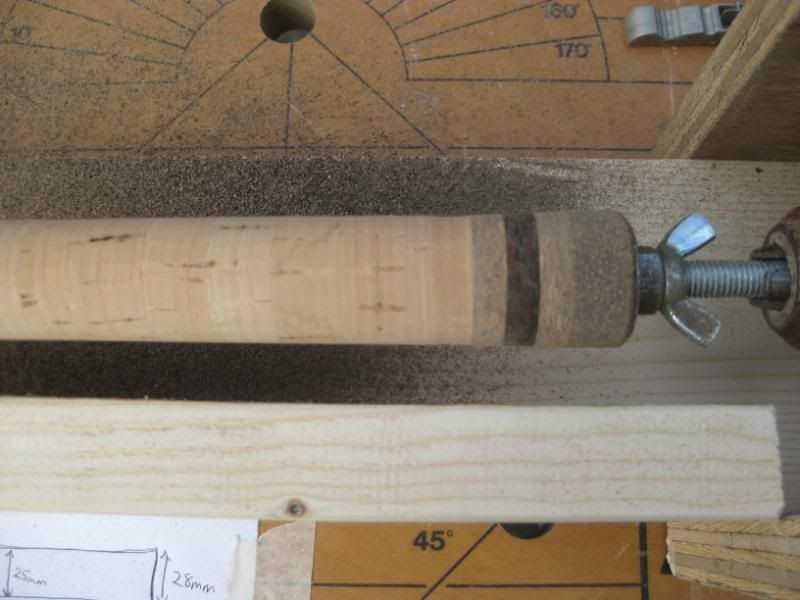
As Ive already mentioned, the threaded rod is your mandrel. It will likely be thinner in diameter than the hole going through the centre of your cork handle. Build a few masking tape bushings so that they are snug against the inside of the handle when it is slipped over them.
Then bolt the handle in place onto the threaded rod / mandrel using washers, nuts, and wing nuts. Dont do it too tight just enough to stop the cork handle slipping when youre sanding it.
Tape up the portion of the mandrel / threaded rod that will sit amongst the wheels this will prevent the rod chewing the wheels up.
Stick the mandrel / threaded rod with handle attached into the drill, invert the drill and place it in the drill housing of your contraption, with the other end of the mandrel / threaded rod resting in the V of the base plate wheels, close the top plate so the ^ made by the top plate wheels rest on top of the mandrel / threaded rod, wedge / tape the drill in place, and its ready to power up and sand.
Ready to roll:
Through trial and error, I discovered that everything works best if the drill is run at a fairly high speed if it goes too slow the sand paper and cork tend to bounce quite violently, but the faster you go the smoother the operation seems to be.
I used three different grades of sandpaper very rough (80), medium (180) and super fine (360). The medium and superfine were really only used for finishing.
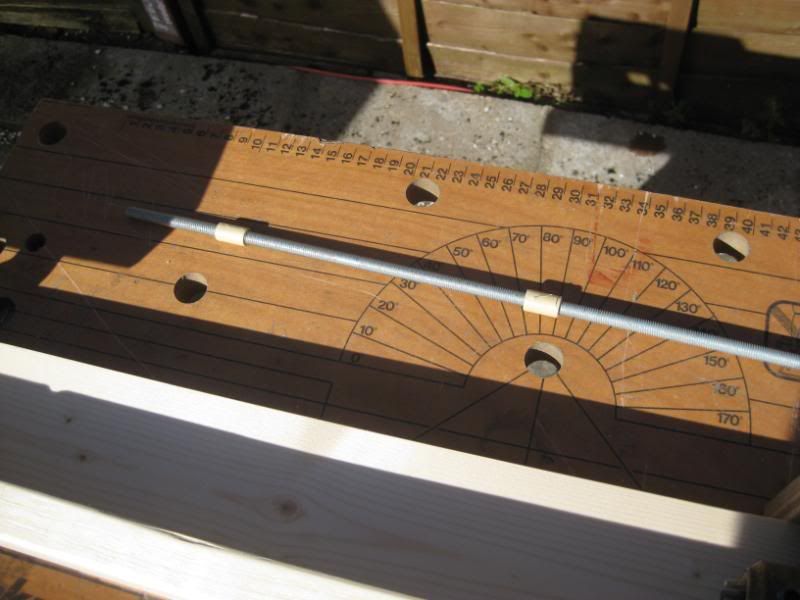
I measured the shape of a handle on another rod and used it as a rough guide for mine. I taped a sketch of the shape and dimensions onto the workbench so it was easy to check my progress as I went along.
I found that the normal cork sanded quite easily, the burl was harder, and the rubberised cork was pretty hard going. I found that when I had all three types of cork stuck adjacent to each other, if I didnt pay close attention, I could inadvertently tilt my sanding hand towards the softer stuff (normal cork) and take too much off just like this ! but fortunately not enough to really notice.