To start with can I just say thanks to those that have gone before on this forum, salmo.proboards.com forum, and rodbuildingforum.com I learned loads from their posts and it really inspired me to take the big plunge.
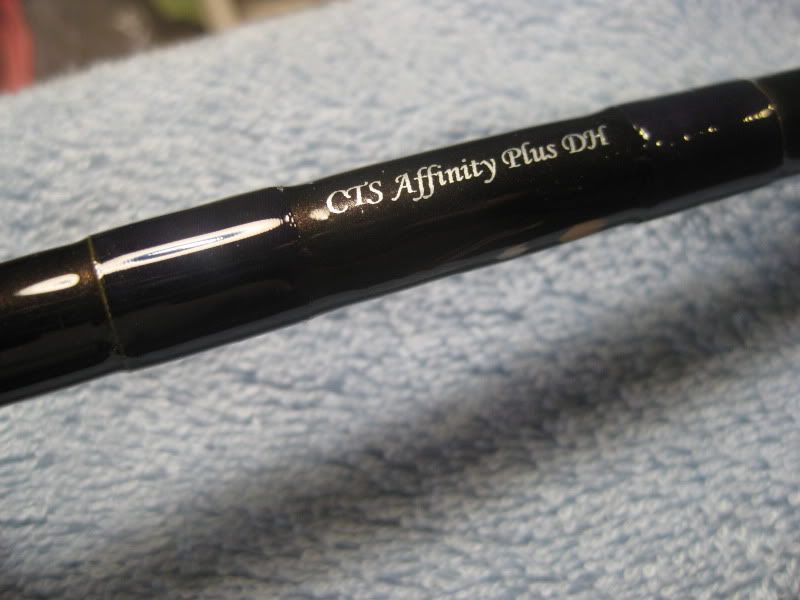
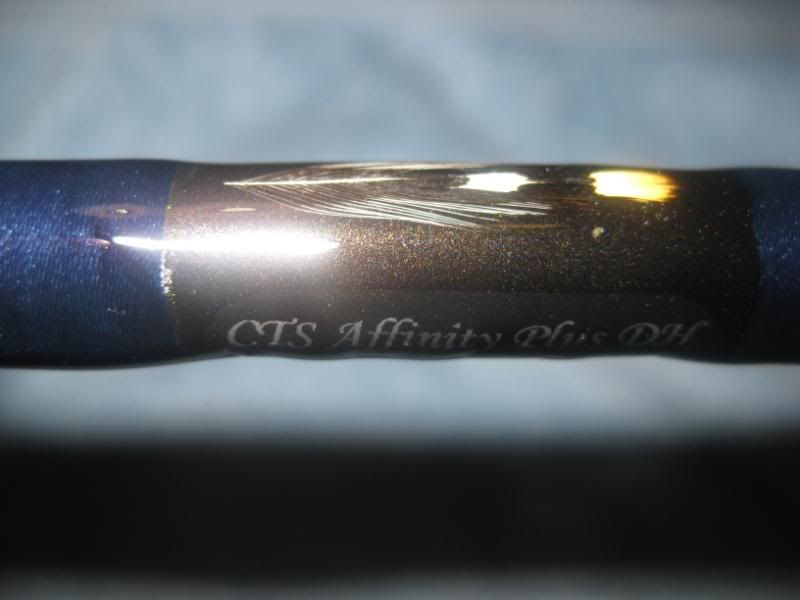
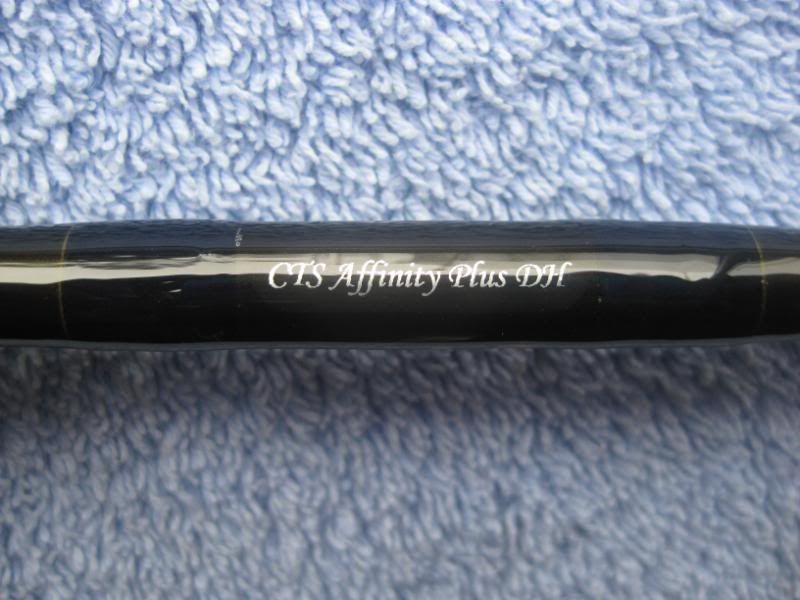
My first rod build earlier this year was a #5 trout rod and that whetted my appetite for a salmon rod. After doing a bit of research I learned that the Highlander rods built by R B Meiser apparently use the Affinity Plus blanks made by the New Zealand company CTS. I reckoned if the blanks were good enough for Mr Meiser, then theyd be good enough for me

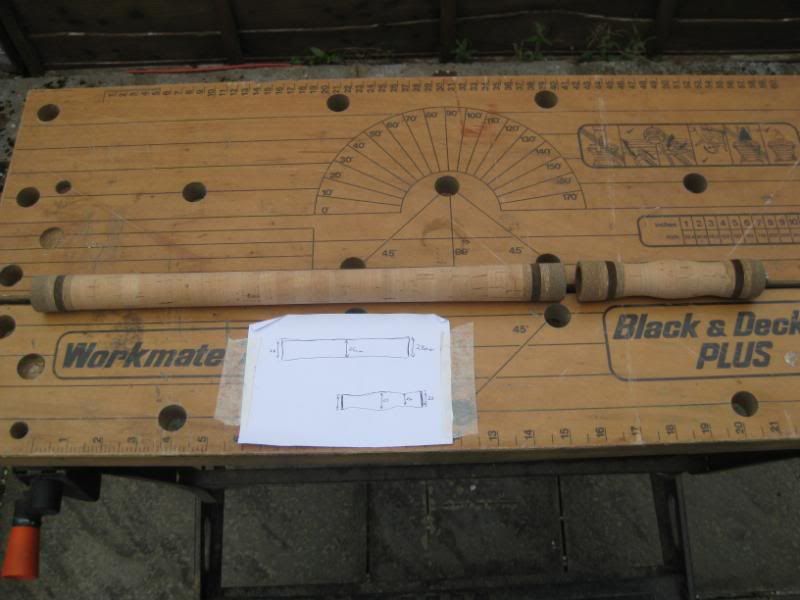
. I ordered the charcoal gloss 14, four piece #9/10 and it arrived five weeks later. I bought a Struble real seat and guides from David Norwich, and got the cork rings for the handle and the remaining sundries from Mudhole Custom Tackle who are based on the outskirts of Orlando, Florida I visited them whilst there on summer holiday.
Why build a Spey handle instead of buying one ? Because I discovered in my first rod build that pre-made handles can be difficult to ream out to properly fit the blank the longer they are the more difficult it is. Youve got to be extremely careful otherwise the hole gets flared at the ends, which can result in a wobbly handle. I hadnt built a handle before. Going by articles on the internet, most folk doing so seem to glue the cork rings direct onto the blank, then turn the blank on a drill and sand the handle down to the desired shape. I wasnt too keen on this method in case I knackered the blank (it cost a couple of hundred quid), or sanded off too much cork which would have meant Id have a pile of trouble removing the handle and dried glue and then having to start over again. My plan was to use a water soluble glue (whilst damp) to stick the cork rings together on the blank, slip the partially dried handle off the blank, let the handle finish drying, and then turn / sand it down on a home made mandrel and lathe. That way I wouldnt damage the blank, and if I went overboard with the sanding it would be a lot easier and probably cheaper to do a new handle. That was the theory, but did it work ?
First step was to build the tools to make the handle, namely a handle clamp and a lathe. I borrowed some ideas from designs on the internet and added in a few touches of my own. Rather than clog up this rod build thread with photos etc of how to make these gadgets, Ive done separates thread on them.
Next stage was to make the handle. Titebond III was the glue I opted for to stick the cork rings together. Its a proper wood glue, can be wiped down with a wet cloth whilst its damp, dries waterproof, dries a colour similar to cork, and sands quite easily. First thing was to ream out the cork rings so they had a marginally snug fit, but not tight, on the blank in what would be their ultimate position. I numbered them on the inside as I went along in case they fell off the table and got mixed up. Then it was just a case of gluing them one at a time to each other on the blank (but not to the blank), and clamping them in place.
Upper handle in clamp with blank going through it
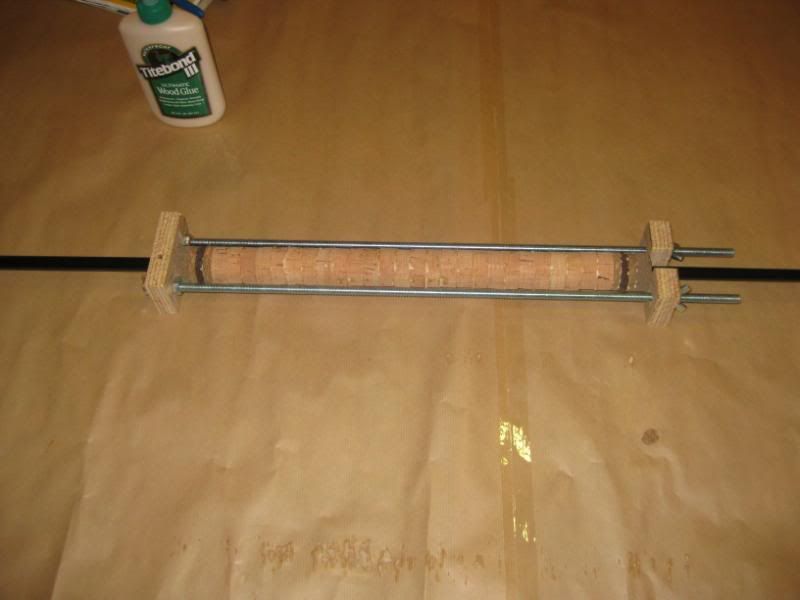
I left the handle clamped on the blank for about half an hour allowing the glue to start working, then gently twisted the blank in a steady spiralling motion out of the assembled handle. The blank came out no problem, but as anticipated had Titebond smeared all over it.
A quick wipe down with a damp cloth and the blank was as good as new !
Both handles were made the same way. Each had to be left to dry for twenty four hours.
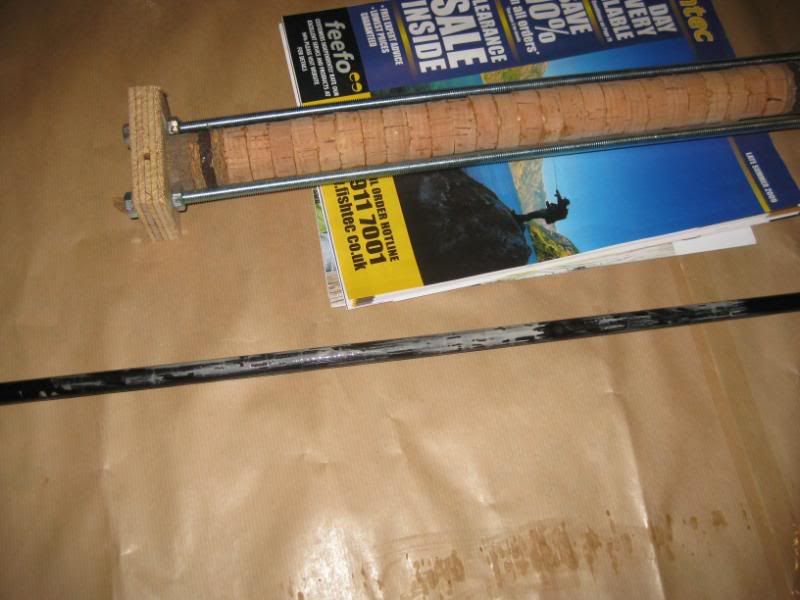
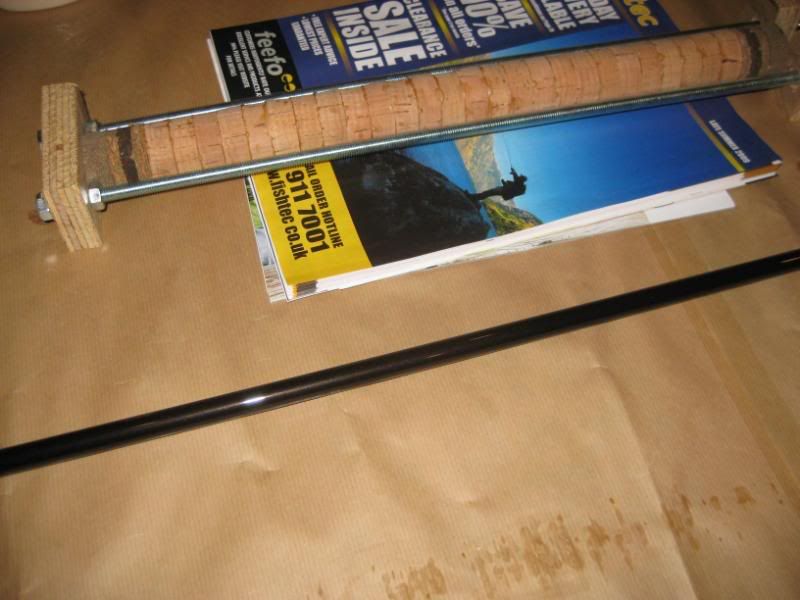
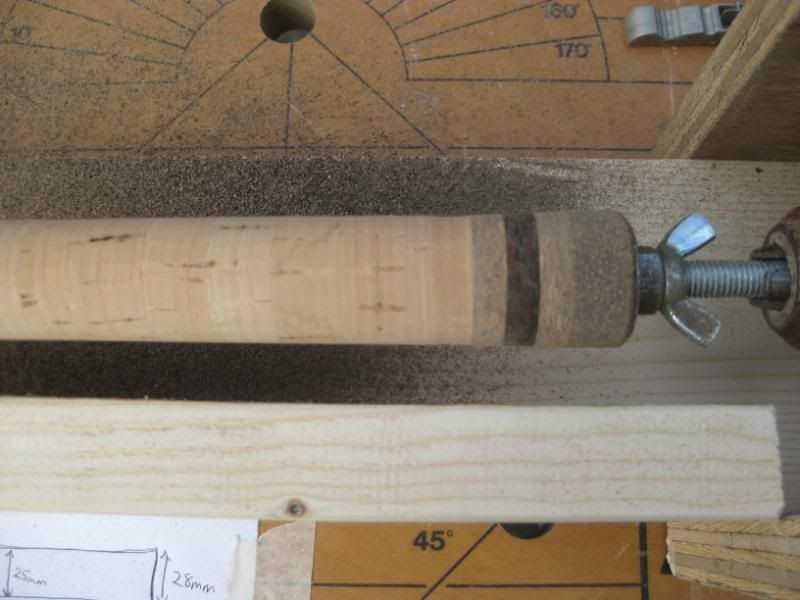
The next stage was to turn / sand the handles to shape on my home made lathe.
Upper handle ready to turn in my homemade lathe
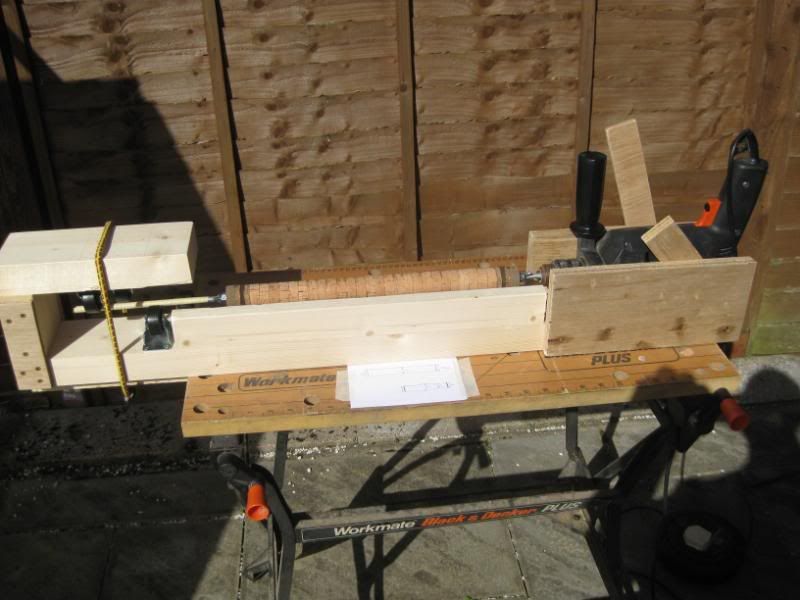
Through trial and error, I discovered that everything works best if the drill is run at a fairly high speed if it was slow the sand paper and cork tended to bounce quite violently, but the faster the drill went, the smoother the operation seemed to be.
I used three different grades of sandpaper very rough (80), medium (180) and super fine (350). The medium and superfine were really only used for finishing.
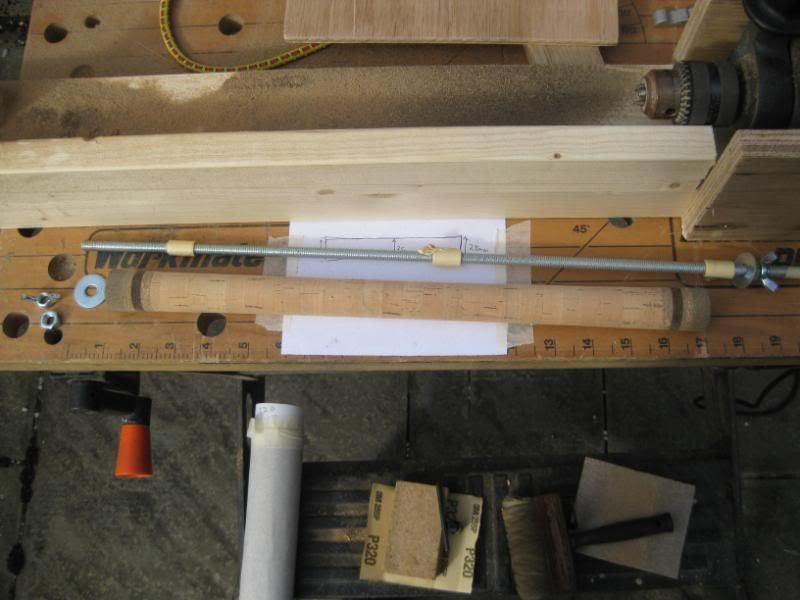
I measured the shape of a handle on another rod and used it as a rough guide for mine. I taped a sketch of the shape and dimensions on the workbench so it was easy to check my progress as I went along, with calipers.
I found that the normal cork sanded quite easily, the burl was harder, and the rubberised cork was pretty hard going. I also found that when I had all three types of cork stuck adjacent to each other, if I didnt pay close attention, my sanding hand would inadvertently tilt towards / dig into the softer stuff (normal cork) and take too much off just like this ! but fortunately not enough to really notice.
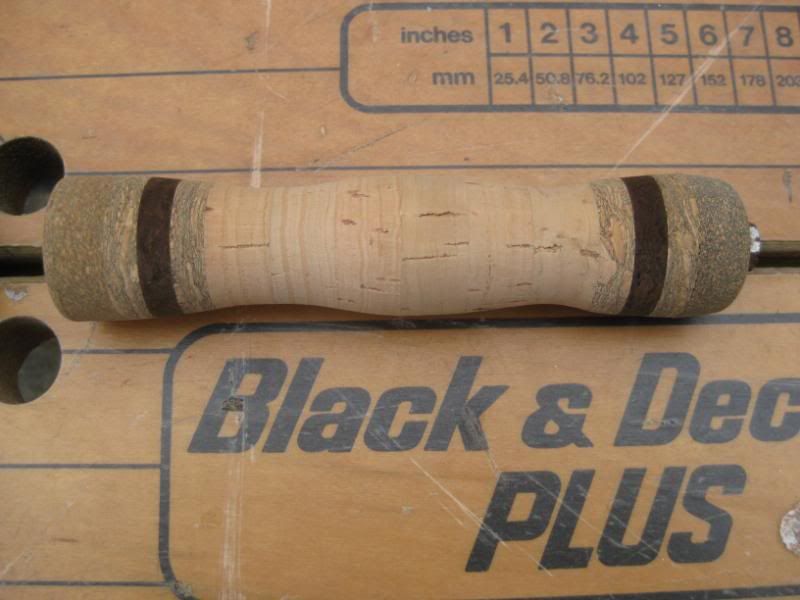
Finished upper handle
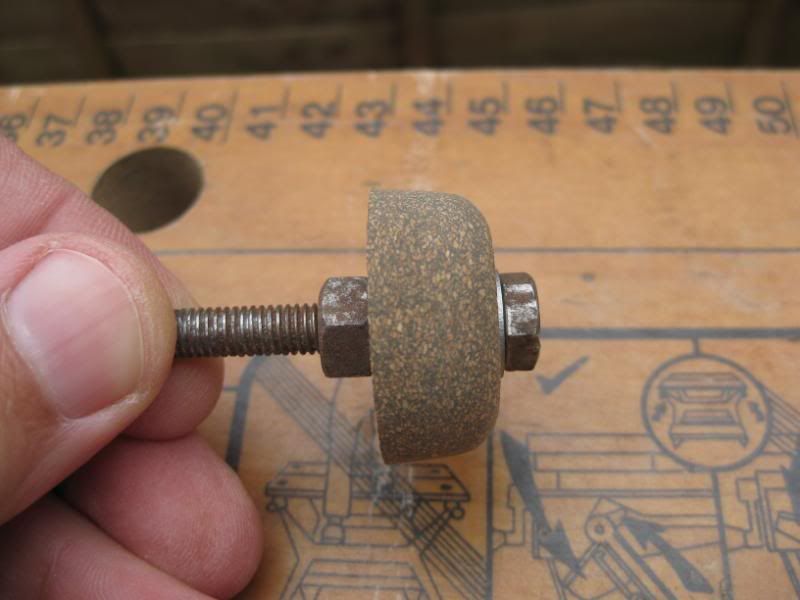
For the butt end of the lower handle I used a piece of rubberised cork. I clamped it onto a quarter inch diameter bolt and stuck the bolt straight into the drill, then sanded it down to the same diameter as the bottom handle where they would join together, and then rounded the butt end.
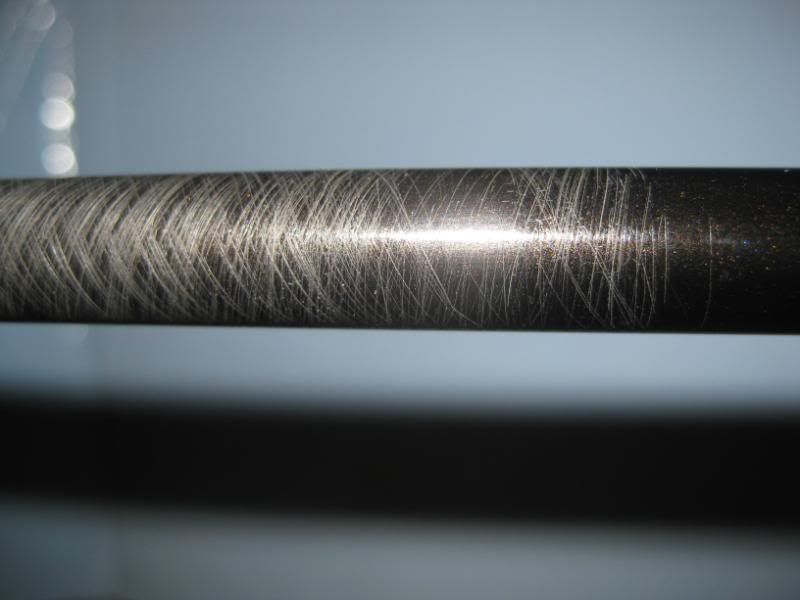
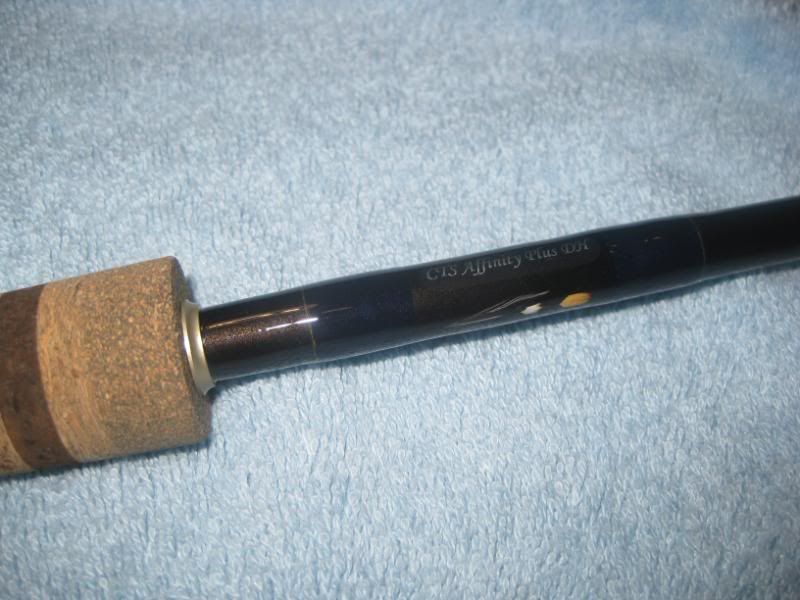
Next stage was gluing the handles and reel seat onto the blank. First thing I did here was to very lightly sand the surface gloss of the blank with fine sand paper to give the glue a good surface to adhere to. Youve to be very careful doing this and not go too deep to the extent that you damage (and thereby weaken) the carbon fibres beneath.
I used Gorilla Glue to stick the cork handles on to the blank. This stuff expands so its to be used sparingly. I chose it for its expanding purposes as mentioned by Builnacraig so it would expand into any nooks and crannies inside the handle and hopefully give a really tight bond. The Gorilla Glue website says that a hint of moisture helps it expand and key onto things so I briefly trickled a wee bit of water through the handle then let it dry for about an hour. Then I applied a thin coat of the Gorilla Glue onto the blank and spiralled the lower handle onto it, ultimately overhanging the butt end of the blank by a couple of millimetres. I had to watch it for about half an hour whilst the glue was expanding. As it oozed out the butt end I scraped the excess away with a cocktail stick. If you spill or smear this stuff you can apparently clean it off whilst its wet with cellulose thinner or xylene.
Oozing / expanding Gorilla Glue
For the reel seat I made some bushings from masking tape, then glued everything in place using slathers of epoxy glue as I thought that would give a better bond to the metal reel seat. If you spill or smear epoxy glue you should be able to clean it off whilst its wet with acetone.
Then the upper handle was attached the same way as the lower handle, with Gorilla Glue.
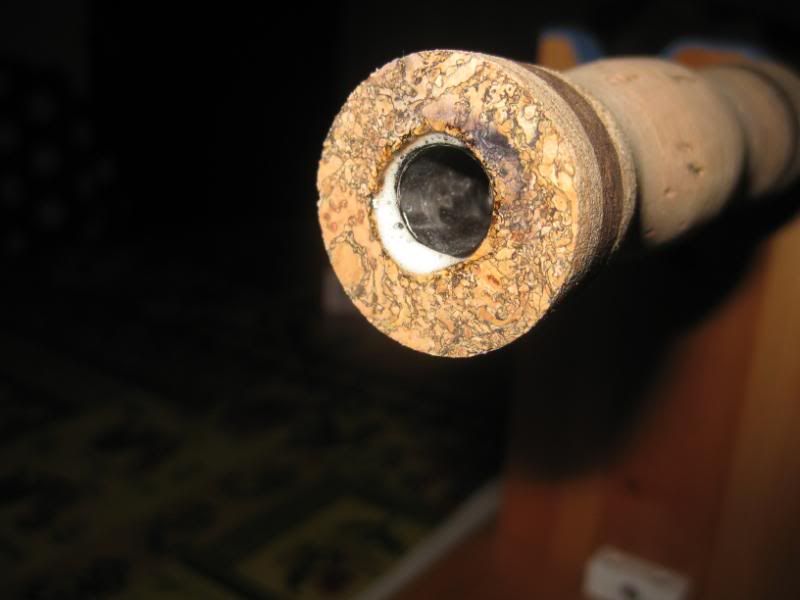
After it had all dried I glued the rubberised cork butt end on with Titebond, and held it in place with strips of masking tape. After it was dry I took off the masking tape and inserted a wee rubberised cork butt plug

into the hole and sanded it smooth.
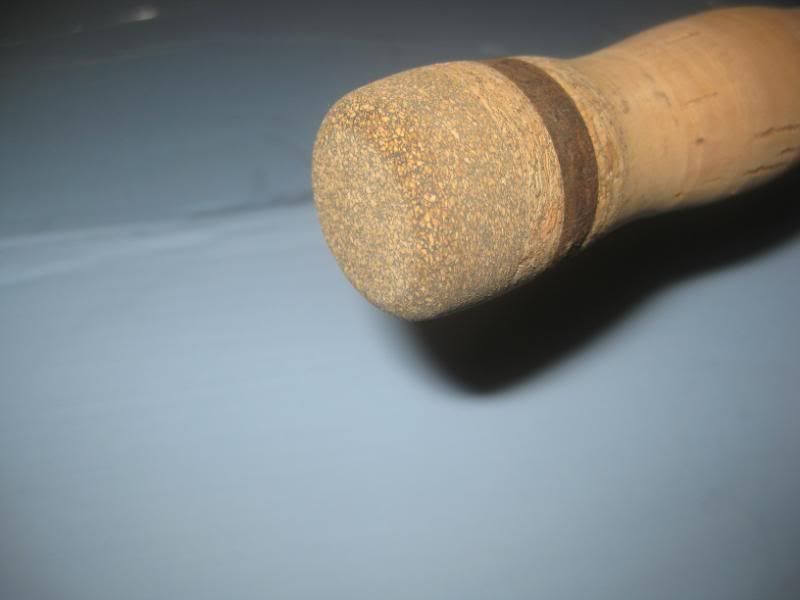
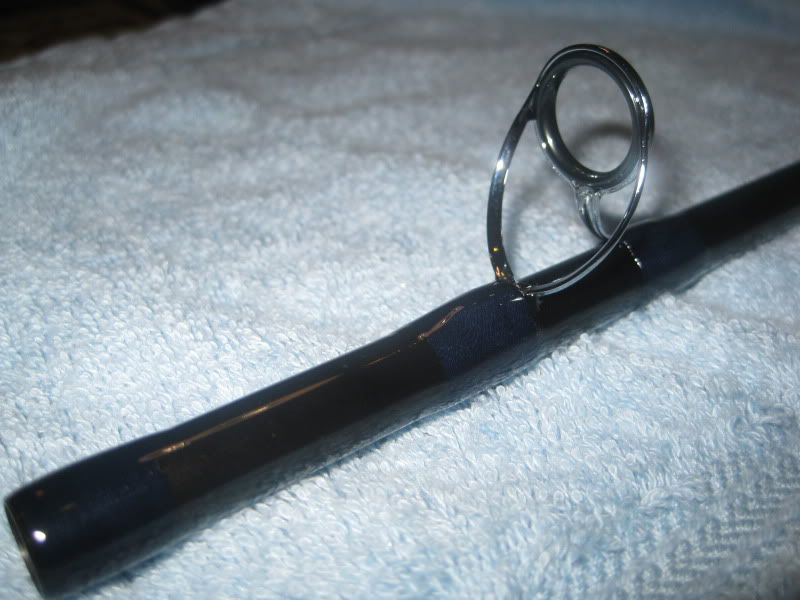
The finishing touch to the handle assembly was gluing a metal winding check to the top of the upper handle.
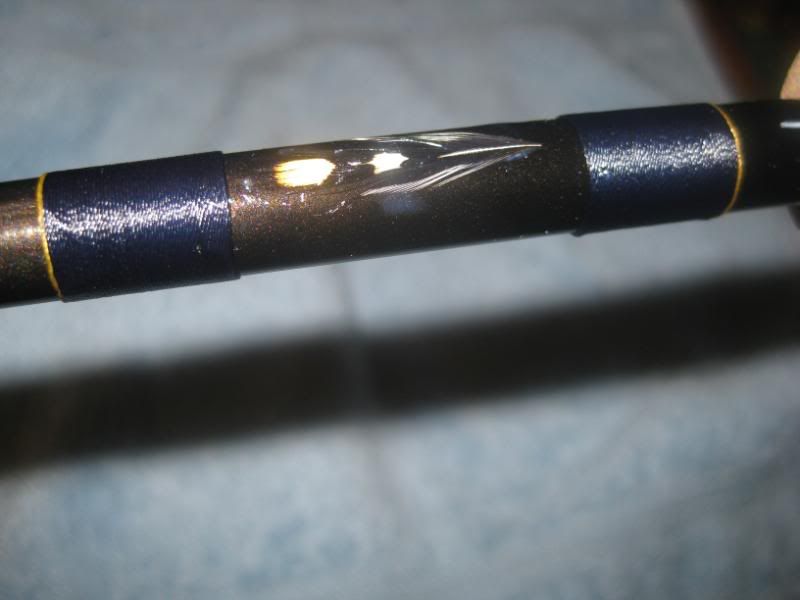
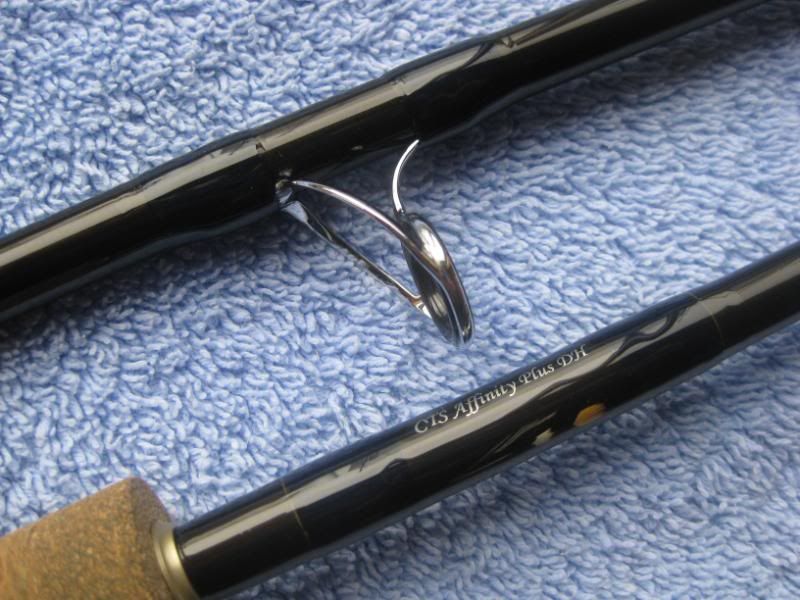
Next, I found and marked the spine of the top section of blank. I couldnt find it in the three lower sections hopefully this wont cause any problems. I read on another forum that someone had a similar experience and put it down to the fancy helix wrapping process used by CTS when manufacturing their blanks. Then I measured and marked the positions for the guides. The first one to be attached was the tip guide, which was glued in place. The others I tacked in place with slivers of masking tape, then whipped on with navy blue Gudebrod D thickness thread. The whippings were then painted with colour preserver to stop them going transparent when epoxied.
When I did my previous (and only) rod build I rotated the blanks by hand whilst the epoxy was drying - the results were okay. This time, to make life easier, I invested in a rotary fly dryer / rod turner, and Im glad I did because I think the results are better. It certainly made it easier when I was applying the epoxy onto the wraps. Before you apply the epoxy you should wipe the area of the blanks which will be covered by epoxy with isopropyl alcohol to remove any greasy marks which could cause the epoxy not to bond properly to the blanks. I then applied Flexcoat Lite epoxy which needs two coats. The advantage I found with this stuff is that after the first coat has dried you can trim any wee protruding thread tags with a razor, so that the second coat comes out lovely and smooth (thanks for the tip Rob & Sandy).
In hindsight I chose the wrong thread colour. It went darker than I wanted when I applied the epoxy, turning into a dark French navy blue I would have preferred it a tad lighter for a bit more contrast against the blank. The flash on my camera makes the wraps look lighter than they appear to the naked eye. Perhaps a royal blue would have been a better choice as it might then have become the navy blue I was really after ?
Nevertheless, IMHO the epoxied whippings look pretty good
The rod was ready to go fishing, but I thought it looked a tad utilitarian. It got me wondering if I should try writing the make / model on it with a gel pen. However if youve ever seen my writing youd know that idea was daft, so I ordered up a couple of water slide decals from tightlinecustomrods.com in the USA.
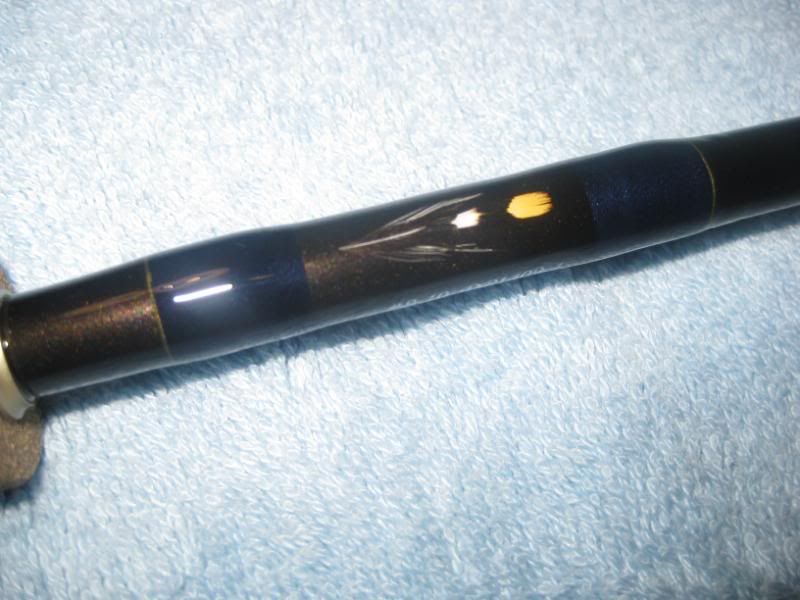
Whilst I was waiting for the decals to arrive I read a few articles on rodbuildingforum.com about feather inserts, even one from Mr Meiser himself. I also read about how to do a single thickness thread highlight wrap (I wish Id seen it before Id done all the other guides - too late now !!). That was enough for me to give both these ideas a bash. I selected two JC eyes from a cape I had lying around, and trimmed them to size. Then I did two separate thread wraps, in essence a mirror image of each other, with a gap in between them big enough to take the JC inlays and the water slide decals (when they arrived).
Basically to do the feather inlays you thin some thread colour preserver and dunk the feathers into it quickly soaking them, then lay them in position on the blank and fine tune with a small brush getting any air bubbles out, and leave to dry.
I gave the wraps and JC inlays a first coat of Flexcoat and left them to dry for twenty four hours.
Then I did the decals. One at a time I placed them in warm water for 5 seconds, then lifted them with a brush, and positioned them. Despite wetting the blank I found that where I first placed the decals, was where they ended up. I couldnt move them even a fraction. Thankfully both were reasonably accurately placed.
After leaving them to dry for a day, I was on the home straight with the last job to do, namely the final coat of epoxy over my fancy wraps, decals and JC inlays. I applied the Flexcoat without problem, stuck the rod section into my turner / dryer, switched it on and went off to watch the TV. Two hours later I checked up on it and
(scroll down)
ß
ß
ß
ß
ß
ß
ß
ß
ß
ß
ß
ß
ß
ß
ß
ß

. the rod turner had somehow lost its grip on the blank which meant the blank wasnt turning which caused the epoxy to sag / ripple.
What a disaster. I tried a hairdryer on it to soften it and hopefully blow it back into position sadly to no avail.
Before scraping it all off and starting again I thought Id try a 3rd coat of epoxy to see if that would level things out. Thank goodness it worked and it looked fine.
The charcoal coloured blank doesnt contrast particularly well with the feathers but when the JC is taken into consideration along with the highlight wraps and decals IMHO they give the rod a wee bit more class.
What would I do differently the next time ?
1. Get a few shades of thread and test with epoxy so I can get a better final wrap colour against the blank
2. Consider the colour of blank with feather inlays in mind, so that if I do them, they are easier to see
3. Do single thickness highlight wraps on all the guide wraps I like them and theyre easy to do
4. Dont leave the rod turner unattended !!!!
The finished rod certainly looks like it will do the business - not quite an Oregon Meiser, more an Aiberdeen Miser. These last two photos were taken without a flash and better represent its proper colour / appearance.

Now I just need to get out to use it AND catch a fish. Im scheduled to be on the Deveron for three days before the end of the season, first one being tomorrow. With it having rained all day today, it looks like the water conditions will be challenging but I still cant wait to try out my new toy.
Ive also posted this on salmo.proboards.com as some of the chaps there gave excellent advice.

Cammy
